How to Make a Basic Kids Bed Frame
- Joe
- Feb 8, 2019
- 3 min read
As the title suggests this build is very basic. I ended up turning this frame into a Power Rangers bed but you can take this basic frame and turn it into any design or style you like.
Materials Used
38mm X 89mm X 3000mm CLS - 3 pieces
720mm X 1420mm X 18mm Plywood - 1 Piece
Wood Glue
Screws
Tools Used
Chop/Mitre Saw
Table Saw
Hand Saw
Drill/Screwdriver
My cut list is made for a kids single bed frame designed to fit a 700mm X 1400mm mattress. You can of course adapt the dimensions to fit your needs.

I used my mitre saw to cut all the CLS pieces to size. You can of course use a handsaw for this too.
I got the plywood cut at the store where I bought it. I did this mainly so I could fit it into the car to get it home. There are many methods you can use to cut the plywood though. If the store didn't have a cutting service I would have used a battery powered circular saw cut the plywood to fit in the car.
I decided to remove material to create the ledge for the plywood to sit on later. You could chose to add material instead though which is fine. I cut a groove out of the 4 rail pieces (Red & Green). The section I remove is 45mm deep and 19mm wide.
The joinery for these pieces is a simple half lap joint. It may be a little awkward to get your head around because of the groove we cut but take your time and make sure its laid out correctly before cutting.
The short green rails sit on top of the long red rails. So using a hand saw, I remove the 38mm cube from the bottom.
The long Red rails go under the short green rails so I remove the 19mm piece from the top.
Its very quick and easy to cut these pieces by hand.
They should go together nicely. Hopefully my pictures and colour coding will help to show what needs to be removed for each piece.
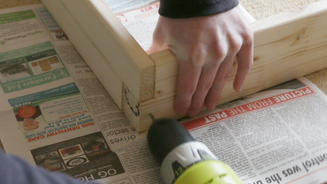
With the joinery done its time to glue it together. I add wood glue to the joints and then drill a pilot hole for a single screw to hold the pieces together while the glue dries.
While the glue is drying the legs can be made. There are 6 in total and they are made from 2 pieces of CLS (Pink & Blue). They get glued and screwed together. The shorter piece will act as a ledge for the bed frame to sit on.
I decided to cut away a 38mm section from the corner pieces to allow them to sit directly in the corners of the frame. I made sure I had them all orientated the right way before cutting.
To fix the legs to the bed frame I used 3 screws. 2 screws down though the frame into the legs and 1 screw through the leg into the frame. I didn't use any glue on these so they can be removed if needed.

Now with the frame and legs done the plywood can be fitted. It drops into place with a 5mm gap all the way around. The plywood gets held in place with 2 screw in each side. Make sure they are on the edge and tighten into the ledge we created on the frame. No glue is used here so the plywood can be removed if needed. It would be a good idea to maybe drill some air holes through the plywood to allow the mattress to breathe.
After sanding all the rough edges the bed frame is done. It is of course very basic, but you can take this design and add to it how ever you wish.
I hope you found this project useful.


just want to say thank you and an excellent simple design anyone can make. thanks a lot all the best